Showing posts with label beauty. Show all posts

Thursday, December 8, 2011

LOTD & Tutorial: Merry Christmas - Look#1

Though I am a Hindu and we don't really celebrate christmas as such, but the holiday season still never fails to cheer me up and make me hopeful for the joys to come in the coming year... Though we are still 16 days away from Christ's birthday but I am excited already :) And yup a merry christmas to every one of my readers even if it is a bit early ;)

As Christmas has such an effect on me I plan to doing a series of LOTDs that are christmas inspired and well this is the first one of the lot :) Hope you guys like it!

So here goes...


Products Used:
Products Used
Eyes:
1. Sleek Eye Shadow palette in Original
2. Oriflame Mono Eye Shadow in Espresso
3. MAC Paint Pot in Painterly
4. Maybelline Gel Liner
5. Maxfactor False Lash Effect Mascara
6. False lashes and Duo Adhesive

Lips:
1. Lakme Absolute Matte Lipstick in Classic Rose

Face:
1. Maybelline Blush in Apricot Flush
2. Lakme Absolute Moonlit Highlighter

Tutorial:
1. First, I primed my eyes with MAC Paint Pot in Painterly. Applied it all over my eye lids.

Priming my lids 
 2. Next, taking the cream highlighter shade from Sleek Eyey Shadow Palette "original", I applied it all over my lids.
Applying the lid color
3. Then taking the golden brown shade from the palette, I applied it on the outer 3/4 region of my eye.

4. Now, using a matte brown shade I blend it along the crease.

5. Finally, I apply a highlighter on my brow bone, liner on my lash line and waterline and coat my lashes with mascara!

6. An optional step is to wear some false lashes for the va-va-voom effect ;)


Hoping you guys liked my look :)

Sunday, February 13, 2011

REVIEW & LOTD: Maybelline Eyestudio Lasting Drama Gel Eye Liner

I have been eying this product since a long time but whenever I would ask for it at any Maybelline counter, they would tell me that it was "out of stock". That made me long for it so much that when I finally bought one I was ecstatic and my happiness knew no bounds :) I felt like a kid who has been bought a new toy but has been asked to wait till morning to play with it... I just kept waiting for it to be morning so that I could finally wear it to office :)

Ok, let me tell you guys about it a bit. This is for those who already don't know about it's wonderful qualities :)

Maybelline Eyestudio Lasting Drama Gel Eye Liner

What the product claims...
 As the name suggests, it is a gel eyeliner, which is extremely smudge proof and long lasting. It is jet black! And when I say jet black, I mean really really JETTEST of BLACK!!! :D I so love it for that...

As is evident from the pic, it comes in a cute glass container with an Aluminium cap and a super soft yet stiff brush. I am really impressed with the brush! The brush is just so perfect and so precise that it is really difficult to go wrong with it.


The gel liner in a pot and the high precision brush...
The gel liner takes 2 seconds to set and once it sets, it stays on the eye for like forever. Another plus for it is that it is odorless and does not rritate the eye. I apply it on my waterline, my tightline and above my lashline and it just doesn't irritate my eyes. My eyes don't burn, they dont start watering and they look beautifully defined :)

It costed me just Rs.375/- and I feel it is a very small price for something so wonderful. After all it is a kajal and an eyeliner combined into one :)

This is how it looks on my eyes:


Monday, January 17, 2011

REVIEW: Maybelline Colorsensational in "Warm Me Up"

Heylo Ladies... It's been so long since I posted anything on my blog and really I have no reasons for it!!! It's just that I got plain lazy :P Well, Winters make me lazy, they make me FAT!!!!
But today one of my readers Zeeba asked me about it and I realized that I need to start posting stuff again and so here I am with a review on a lipstick that I purchased yesterday :)

Warm Me Up

It is Maybelline's Colorsensational Lipstick in "Warm Me up" 235...

Maybelline ColorSensational Warm Me Up
It comes in this really pretty looking case. It is a transparent brown and a steel casing and looks really smart and pretty on the dresser :)
Maybelline Colorsensational
The color is a nude pinkish brown and it has an extremely creamy texture. The lipstick is very moisturizing and is pretty long stay :) I wore it to office today and it stayed post lunch!!! Well I was impressed :)

Warm Me Up
The great thing about the lipstick is that it doesn't dry ones lips and keep them moisturized all throughout the day. And I am saying this in the middle of Winter!!! :P

Another plus about this product is that it smell yummy but has no taste :P
Its a YES YES YES for me and I plan on purchasing more and more shades from this range :)

Monday, November 15, 2010

EOTD using Oriflame Visions Customizable palette for eye shadows

Hey guys... I recently came across this awesome deal in the Oriflame catalog. It said that on a purchase of three eye shadows I could get an empty palette free. The shadows thus purchased could be fit into the empty palette container and carried out. The palette also comes with a free two sided sponge applicator.

Some images to give you an idea :D

The empty palette box and the shadows

The empty palette box from inside

The shades...

The shadows placed in the palette

Swatches: Devil, Wicked, Go Green
So, today in order to try these colors out, I went a bot overboard and came up with this EOTD :D


Hope you guys liked it :D

Sunday, November 14, 2010

REVIEW: ORIFLAME Visions Soul Mates Eye Shadow Duo

I have been always a loyal fan of Oriflame and have always loved their creams and perfumes. The fragrances that they offer in perfumes as well as creams are the best I have ever come across... Anyways, just recently I have started using their eye shadows and I haven't been let down as yet :D

Today I shall be reviewing Oriflame Visions Soul Mates Eye Shadow Duo, which is a request from one of my lovely blogger friend Bulbul... She had asked me to review these eye shadows in one of her comments for my post on Purple Smokey eyes Look ...

So here goes...
Today I'll be reviewing shades in Romeo and Juliet and Adam and Eve...
Oriflame Visions Soul Mates Eye Shadow Duo

Adam & Eve: Green and Blue
Romeo & Juliet: Beige and Green

PACKAGING
I like the cute packaging in transparent acrylic with silver lettering saying "Visions Soul Mates Eye Shadow". It has a flip top and the embossed design on the shadow is also extremely cute and attractive. The container is extremely sleek and look like discs. They can be carried around in one's handbag/purse very easily and conveniently. The container is pretty sturdy too :)

COLOR
I love all the colors that Oriflame offers in this range of eye shadows. They are all highly pigmented and are pretty long stay. They have very tiny shimmery particles in them, that enhances the make-up and doesn't look tacky at all. The colors can easily be blended and they feel really soft.
The best part about them is that they have negligible fall out and I am comparing this to REVLON's Color Appeal Trio Pro and L'Oreal's Kohl Mineral Eye Liner.

The swatches of the colors are as follows:

Swatches: Soul Mates Eye Shadow

The 2 colors on the left side in beige and brown are ROMEO & JULIET
The dark green color and the sky blue one are ADAM & EVE

The other two colors in purple and parrot green are from a different type of palette and shall be reviewing it soon :)

PRICE
Each duo costs Rs.198/- and I find them worth every rupee.

In order to demonstrate the pigmentation of these colors, I have a done a green smokey eye look... The link for it is here: http://makeupandbeauty.com/black-green-eye-makeup-tutorial/

Let me summarize now...

PROs
  • Highly pigmented
  • Great colors in this range
  • Cute yet sturdy packaging
  • Portable 
  • Odorless (its a plus for me!)
  • Smooth and light texture
  • Negligible fall out
  • Reasonable
CONs
  • Not available in matte colors

Monday, November 8, 2010

REVIEW: L'Oreal Kohl Minerals Eyeliner


I went cosmetics shopping over the weekend in Mumbai and ended up buying a lot of L’Oreal products. One product that I had on my wishlist since pretty long was the Kohl Minerals Powder and so I picked it up with great enthusiasm in Meteorite Blue. I used it this morning for office and have had a mixed feelings experience.
L'Oreal Kohl Minerals Eyeliner

What the site says
Whether you're going for dramatic smokey eyes, or a softer romantic 'barely-there' look, Mineral Kohl makes achieving perfect eyeliner easy. In 3 mineral inspired shades the gentle mineral eyeliner is 95% from minerals and perfume, preservative and talc free.
The gentle formula is enriched with Vitamin E and Aloe making it suitable for the delicate eye area.
It has no Perfumes and no preservatives and contains mineral pigments for gentle definition.

My Experience
I purchased it cause it looked different, had a novel packaging and I simply loved the shade of blue that was on offer… Meteorite Blue!
Here's a swatch...
Loved the shade: Meteorite Blue
Packaging
Like I already said, I just loved the new and novel container of the eye liner. It looks smart, is portable and looks a bit intimidating at first ;)
The transparent plastic helps in gauging the amount of contents left. It has a perforated layer that helps adequate amount of product to be used and is extremely helpful, something like the packaging of loose powder.

Perforated Layer
 
Application and Applicator
The angled and sleek brush applicator that comes with it is extremely soft and yet stiff and makes lining the eyes very easy and convenient. A little product gives a lot of definition and is highly pigmented. It does have a lot of fall-out :(


The innovative applicator

Consistency and Feel
The mineral powder is very light and is highly pigmented. The subtle sparkle and glitter that it contains looks beautiful on the eyes and doesn’t look tacky at all. Also a plus is that it is odorless :)

Overall Experience
I have had a bittersweet experience with it. The color and pigmentation is what I loved. But it’s major fall-out and non-long staying power put me off a bit :(

In order to summarize, let me list down the pros and cons. So, here goes…

PROs
  • Awesome color
  • Highly pigmented
  • Just enough glitter
  • Odorless
  • Reasonably priced at around 500 bucks
  • Easy and convenient application
  • Soft and good quality applicator
  • Love the novel packaging

CONs
  • It isn’t very long stay
  • Smudges easily
  • Has a lot of fall-out
  • Less variety of shades

Will I use it again?
Hmmmm… I guess so.. There is something extremely attractive about the product :D

Monday, November 1, 2010

Smokey Eyes for Everyday Wear

Smokey eyes have been IN since a long time now and the make-up trends for Fall Winter 2010 have also been "forecasted" as smokey eyes and bright lips. So, I thought why not go for a smokey eye look that is subtle and can be worn everyday... even to work. And so, I have come up with this look and hence a tutorial to share with you guys :)
 

The look goes something like this...
 
Well... For this look I have used the following products:
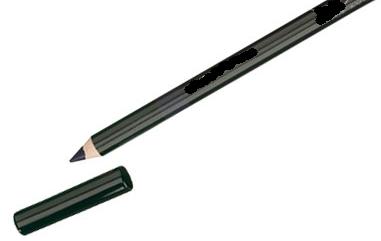
1. maXfactor Kajal: Black
2. ELF Brightening Eye Color Quad: Drama
3. ELF Liquid Eyeliner


Here go the steps:
1. First of, I use the kajal pencil to line my waterline and the upper lid thickly. It need not be neat, it should just impart a thick black line over the lid.
2. Next, choosing the darkest grey of th
e shadow quad, smudge it on the kajal that was applied on the upper eye lids and blend them together.
3. Next line the upper lash lines with the liquid eye liner and using a blending/smudging brush smudge the liquid liner on the lids.
4. Then line the lower water line with the li
quid liner.
5. Finally, coat your lashes with mascara...


Ta da... you are ready to go :)

Tuesday, October 26, 2010

TOP MISTAKES IN "MAKING UP"

My first stint with makeup consisted of Lakme lipsticks, nail polishes from TipsNToes and the occasional Yardley or Charlie perfumes that adorned my mom's dresser. Since childhood I was curious about makeup and the moment I started getting my pocket money all I did was splurge on experimenting with various types of cosmetics. I wasn’t happy with only lipsticks and nail polishes, I wanted more! I wanted blush, I wanted mascara, I wanted foundation, I wanted kajal… Yes... You do get the drift right? So I experimented to my heart’s content.

Now when I look back to my experimenting days, I cringe. I keep counting these faux passes that I committed and want to now share with you all the top mistakes that we are bound to commit while starting to make-up for the first time! So here I go…

While applying Foundation
Who doesn’t want a flawless complexion, radiance and glow on one’s face? And the shortest way to achieve it (if not naturally) is by applying foundations. Applying foundation is exactly what it sounds to be. It is preparing the foundation to your makeup. You screw up your foundation, you screw up your makeup. Direct proportion you see :D

The most common mistakes we make while applying foundation is as follows:

1. Using a foundation shades lighter or darker to your skin tone: Buy/apply foundation that
matches your skin tone! If not well versed with this process, do ask the SAs for help!
2. Choosing a wrong formulation for your skin type: Oily skinned people should opt for light,
oil free foundations. Likewise, dry skinned people should opt for base makeup with added
moisturizers and light reflectors.
3. Applying base makeup too heavily: One must apply foundation with a light touch.
4. Not setting your foundation: Once the foundation has been applied, one must apply a compact of a shade similar to one’s skin tone.

While doing up the lips
Makeup they say can virtually change the way you look. It can highlight one’s salient features and can be also be used to hide one’s flaws. Changing the shape of your lips, altering its width is all possible by using lipstick.

The most common mistakes we make while applying lipsticks is as follows:

1. Using a lip liner of a shade much darker than the lipstick shade: The lip liner used to define
your lips must be a shade matching your lip color or the lipstick color.
2. Applying lipstick directly on chapped lips: One must exfoliate one’s lips and make it smooth
before applying lipstick.
3. Applying dark lipstick on thin lips: One must avoid using dark shades of lipsticks on thinner
lips as darker shades give an effect of thinning your lips.

While doing up the eyes
Eyes are windows to one’s soul and hence it is important to make our eyes up in order to ensure that our soles are perceived as beautiful ;)

The most common mistakes we make while applying eyeliner are as follows:

1. Crooked lines: One must ensure that our hands are stable enough to draw “uncrooked” lines
before venturing into liquid liner territory.
2. Clumping your mascara: Ensure non-clumping of mascara by adding a second coat on your
lashes before the first coat dries!
3. Matching your eye shadow exactly with your clothes: It is always advisable to complement your clothes with an eye shadow that complements the color of your clothes rather than matching them directly.
4. Applying a cream based eye shadow without a primer.

While applying blush
The way base makeup provides foundation for your makeup, in the same way blushers provide the finishing touches to one’s makeup. It could make or break the overall effect of the makeup one might have very painstakingly applied.

The most common mistakes we make while applying blushers are as follows:

1. Applying a little too much: In order to avoid looking like a clown one must first practice by
using a minimal amount of blush and swirling it on one’s cheeks with a fluffy blush brush.
2. Not matching the blush to your skin tone: Important rules to follow here are using light
shades in the daytime, colors like pink, rose and coral for fair skin and tawny brown for tan
skin tones.

Friday, October 22, 2010

Skin Care for Winters: Part I

Many of us face a problem of dry skin and the condition tends to get worse in the Winters when the humidity is low. This gives rise to itchy skin,
"stretchy" skin and sometimes in severe cases leading to "cuts". I live in Pune, which isn't really known for it's cold winters. It's almost as if the winters just pass us by and it's time for Spring again! But you see, there is a problem… Cold or no cold my skin starts getting stretchy and tight just as October starts to roll in… It's as if my skin "wakes up when September ends"… ooh! now that sounded clever ;)

Anyways, after a period of research and experimentation, I have finally discovered the perfect combination of products that have now become my favorites in helping me combat extreme dryness during winters… My skin just loves them and they in turn pamper my skin to bits :D You see there is so much love here ;)

The products that I want to tell you guys about can be categorized into two types:
• Oils
• Creams/Moisturizers

There are these two oils that I swear by, one being Olive Oil and the other Almond Oil. I have been using Olive oil for quite some time now but I have just recently realized the potential of Almond oil and how much it works towards making my skin supple and glowing.
Let me take you through each one of them :)

Two of my fav body oils :)

OLIVE OIL
Olive oil is a fantastic source of Vitamin E and can be used all over the body on your skin. My skin being on the extreme dry side simply laps up the oil and makes me feel all conditioned and loved :) It's consistency is a lot on the oily side (it's an oil after all), so I generally use it on my hands and legs before I go to sleep. This helps me wake up all happy and smooth. Olive oil is generally found in three types- "Extra Virgin", "Virgin" and "Pure". Extra Virgin Olive oil is the purest form of oil and contains negligible additives, while the other two forms contain more additives. The pure olive oil is generally a mixture of virgin and refined olive oils.
Olive Oil
Benefits:
✓ Can be used as a night cream due to it's richness with Vitamin E
✓ Can be used as a lip balm
✓ Applying Olive oil to dry skin helps the skin regain it's natural moisture.
✓ It also helps in reducing damage caused by sun exposure.
✓ The Vitamin E in Olive Oil makes it very beneficial as an anti-aging product.


ALMOND OIL
Almond Oil is another oil that is a very rich source of Vitamin E and hence there are no prizes for guessing how good it is for your skin. This is one oil which is compatible with all skin types. Moisturizing with almond oil eases rashes and chapped lips and skin. When used regularly it provides a healthy glow and hence I apply it to my face and neck every night before going to sleep. I have been using this for less than a week and yet my friends and colleagues have been telling me about how my skin has started to glow :D Yay Yay Yay!
Almond Oil
Benefits:
✓ Improves complexion and retains glow
✓ Relieves dry and itchy skin
✓ Moisturizes deeply
✓ Lightens dark circles
✓ Delays the aging process
✓ Cures chapped lips and skin

Tuesday, October 19, 2010

Winter 2010: Makeup Trends


With the advent into the end of the year and with the festive season starting, it is now time to get rid of the Summer trends and welcome Winter with new smokin’ trends! This years Summer and Spring trends tended towards nude and colorful looks respectively. So, dramatic eyes and defined lips come as a no surprise for this year’s Winter Season.

This Winter, it’s all about Smokey eyes in any color. The lips need to be defined in not necessarily Red but also Metallic Purples, Coral, and even Magenta!


Dior now is out with it’s “New Look Dior Smoky Fall 2010 collection” showcasing color trends that see a lot of smoky purples, seductive and shimmery shades, bold red lips and glamorous eyes.

Thursday, October 7, 2010

REVIEW: ORIFLAME Visions Peach Me Perfect Skin Glow


I have always been scared of foundations and hence have always steered clear of them. They scare me, they intimidate me and they totally make me want to run for my life! I am a sucker for natural looking skin and hence I could never get myself to put a mask on my face and go around town. But... yes there is a but ;) But there came a day when my friend who is a consultant with Oriflame showed me one of her catalogues. Oooooohhh... The yummy looking Visions Peach Me Perfect Skin Glow was on discount! and it looked so tempting and so so sinful in that catalogue that I just couldn't stop myself from buying it. Phew! and there went my resolution to be a smart make-up shopper out of the window!
Anyways, now that I had bought, I had to get it to some use. So, first I tried the traditional method of using it as a foundation all over my face and well I have to give in and tell you honestly that it was good! It was more than good. It felt light, did not have the powdery/matte effect that loads of foundations do and it gave an instant glow! I loved it! It blended really well into my skin and the glow it imparted did not look OTT and could be worn even to the office :D Yay!
But,,, yes there is that but again (no pun intended!), but like I told you before I totally dislike the feeling on something on my face and so the foundation effect made me not use it for a while. Aaaah! what a waste of a purely good and a competent foundation you'd say... and well yeah I felt the same and so I thought of a new way to use it :) LOL... Yeah I used it to tint my daily moisturizer i.e. my Garnier Body Cocoon, which I have already reviewed HERE.
Anyways, coming back to my stint with tint (awesome! I love the way it sounds), all I did was take a tiny circle of the foundation on my palm, put some regular glob of moisturizer mix it with rubbing both my palms together and applying it on my face and neck as usual. Dude! It was amazing! My moisturizer moisturized well, like it is supposed to and the foundation mixed in my lotion imparted that subtle glow and glitter to my face :) I simply loved the effect :)
Let's now discuss the pros and cons of this product.
PROS
1. It blends well.
2. Yummy subtle fruity lemony smell
3. Very good coverage
4. Imparts a very natural looking glow
5. It feels very light on the skin.
6. Affordable at Rs.249/-. Though I bought it at a discounted price of Rs.189/-. Yay! :D
CONS
1. A single shade. Dunno if it would match all complexions!

You guys must try it out ;)

Saturday, September 25, 2010

Makeup-o-holic on a budget

I love make-up and trust me when I say that I never let anything, be it the weather or my mood or anything else come between us!You see this is true love and I really wish for you to understand what I really feel for it. Of course you are all welcome to leave your comments here and let me know about your respective obsessions...

My obsession you see starts with make-up and ends with the same. So, why am I gushing so much about it you'd ask and that is because the month is coming to an end and I get to again go cosmetics shopping :D You see I have this rule that though I don't like to follow but I am forced to follow in order to keep my make-up shopping budget under control. The rule is that I am not allowed to buy more than 2 products or spend more than 1000/- a month on cosmetics (whichever is more). Well, honestly I don’t always follow it to the hilt but trust me when I say that I do really try my best. Sometimes when the temptation is too much to bear, I manage to convince people around me (read sis, mummy, bf, bff etc) to actually gift me some stuff. LOLZ... And since I never win any give-aways I am not mentioning them here!

Well anyways, the point here is what if I feel greedier than usual (for cosmetics) and my budget as well as gifts doesn’t satiate this greed of mine? Well... It's simple! I either go all out and buy stuff that's dirt cheap or literally make some stuff :D

Here's a list of a few:

1. JAI KAJAL

My colleagues tell me that it is actually pronounced as "Za-ee". Well, it's a small dibbi of extremely smooth kajal which costs about 10 bucks. It's highly smudgy but I simply love the color it imparts and the tingly-tingly sensation it gives due to the camphor it contains.

REVIEW: http://isimplylovemakeup.blogspot.com/2010/09/jai-kajal-ki-jai-ho.html

COST: Rs.10/-

2. VOV NAIL PAINTS (fake ones)

Well you see, I have heard about this Korean brand called VOV, that makes nail polishes and removers mostly. These are available in malls all across the country for Rs.45/-. Now there is a twist as well. Fake VOV nailpolishes are available as well in the market. They are generally stocked by the roadside accesorry vendors. I picked up four of them in really pretty shades for Rs.20/- each :). Now I know it's not good to use fake/cheap nail polish and hence, I picked these up for Nail Art purposes only ;)

3. Making Lip glosses

Well honestly, I came across this trick on the net somewhere, but it has fabulous results! The procedure is as follows:

Take a glob of Vaseline (yes! the petroleum jelly) and melt it in the microwave with a few choco-chips or pieces of chocolate. Yummy chocolate flaboured lip gloss is ready :) You can store it in old lip balm containers, though in summers you might need to refrigerate it :)

4. Making OAT Moisturizer

OK, this is one really awesome moisturizer and I got this recipe from the net from the following blog: http://www.makeupandbeautyblog.com/beauty-tips/diy-beauty-with-kitchen- cosmetics/ . I tried it out and it worked wonders for me!

Add a handful of oats to some cold water and let it stand for say half an hour. Sieve the mix using a strainer and the milky liquid can be used as a moistirizer :) It's odorless and works wonder for your skin...

Hope you find these as helpful as they were to me :D

Thursday, September 9, 2010

EYE SHADOW: a start...


“Your eyes are the windows to your soul” is what someone great had said. If it is true then we have got to get our eye makeup right ;) Isn't it? So here we go discussing eye shadows in this blog. Before I start... Ladies please feel free to write your comments and give me some feedback as how we could together make this blog more and more helpful for make-up junkies like us ;)

Further, in order to structure the blog such that it is easy to absorb info, I have divided the section on eye shadows in three different posts. Each post shall deal with the nitty-gritties of achieving beautiful eyes using eye shadows.

Eye shadows can make or break a look and it is very important to strike the right balance between under-dramatic and over dramatic eyes. Eye shadows not only add color to the eyes or highlight them, but they also help in changing (virtually), the shape and size of your eyes.

Before we go ahead, let us go through some rules that I swear by and most beauty and make-up blogs and articles also stress on. The rules are as follows:
1. Thou shalt not highlight the eyes AND the mouth at the same time.
2. Thou shalt not extend the smokey-eye look up to the eyebrows.
3. Thou shalt always use shadow brush and not the spongy applicators that come with the
shadow.
4. Thou shalt apply eye shadow according to the type of eye thou has been gifted with.

Tuesday, August 31, 2010

The KOHL

Kajal, Kohl, Surma... Call it whatever but today, women world over swear by it. Traditionally used since some infinity years in South Asia, Middle East and Northern Africa, the credit of making it a popular cosmetic perhaps goes to CLEOPATRA.

Cleopatra may have used kohl to protect her eyes from the sun's glare but today it has become an essential in every woman's vanity pouch. I for one cannot let a single day go by without kohl-ing my eyes.

We may use it for varied purposes, but the main purpose for a kohl to serve as a cosmetic is to emphasize and dramatize the eyes. I have been using kohl since the past 9 years now (yes I started young and no I am not old!) and can say for sure that I have finally found the method of application that suits me best!

Yes ladies... you all heard me right! It took me 9 long years... And no I am not slow or dumb. I have always liked the effect that kohl has had on my eyes but I could never find a way in which I was actually satisfied with its effect! And I am sorry to say that 90% of the women I see with kohl-rimmed eyes actually fail to impress me with their kohl-application. Ha ha, I know I know I have no right to be condescending but ladies... do you really not want to hear what I have to say?

Ok here I go... first it took me some experiments and hence loads of expenditure to zero-in on the form of kohl that suits me best. Yes you heard me right. The form of the kajal is important :)

My first tryst was with a waxy stick in a plastic-ky casing shaped liked a FAT PENCIL...Yes yes! you guys guessed it right! It was the LAKME KAJAL! Sad to say, it didn't really work for me. I didn't find it smooth enough and it smudged too :( But for the pocket money that I received while I was in school, it did see me through... Next i tried experimenting with a Kajal shaped like a conical crayon... I am sure you can imagine it... THE HIMALAYA KAJAL... Nah! It smudged a lot! And again it wasn't smooth enough or even black enough for me. I was starting to get a bit disillusioned here, but alas I did start earning some money by doing fashion shows for my college and yippee I bought my first internationally acclaimed brand's "kajal pencil". It was from CHAMBOR! It wasn't black or smooth enough for me (am sure you guessed it by now) but it was smudge proof! Yay! yay! Finally I get a smudge proof kajal pencil... But if there is a God, which I was sure of, I would soon find a kajal that'll be smooth/black enough! And soon enough when I tried a kajal pencil from another very very expensive brand I found the black and the texture that I was looking for. Thank You REVLON! I very happily wore it to an office function and AAAARrrgghhhhh by the end of the day it had run all over and I looked like a Raccoon :( Dude! What a disaster!!!

For a long time I alternated between my expensive smudge-proof CHAMBOR kajal and the super expensive smooth one from REVLON. I used the CHAMBOR one for when I was travelling or when I knew I'd have looooong days at work and used the REVLON one for cocktail parties and other such short events. But one day lighting struck! A storm brewed! And Voila! I had the perfect solution :) Yay Yay Yay! I knew the way out! I was fed up of choosing between smudge proof and perfect color and now I had the key to enjoying both... Yipee...

So finally all that was required was lining the internal rim of my eyes with REVLON's jet black kohl and using the CHAMBOR kohl to dramatize my eyes by applying it under my lashes and below my eyes :) The result? Super defined eyes and that too smudge proof :D