Showing posts with label EOTD. Show all posts

Wednesday, December 5, 2012

In The Spotlight: MAC Club Eye Shadow

Welcome to another edition of "In The Spotlight" and today we are featuring MAC Club eye shadow. When you google MAC Club, you come across mixed reviews about this shade and almost negligible reviews from Indian blogs. We Indians are I guess still exploring the possibilities with makeup and tend to walk on the safe path... Especially for products that cost the earth, we like to checkout reviews online extensively and look at swatches after swatches and then finally go with a shade that seems to be the most popular with all beauty bloggers... We all end up with similar shades of eye shadows like Naked Lunch, Mythology, Expensive Pink, Cork, Carbon Black, Folie, Texture, Rice Paper to name a few...


Now this doesn't quite work for me... Why, I don't know but it just doesn't... Now am not saying don't read reviews on beauty blogs, rather if I said that then I would be putting my feet on the "kulhari" myself :P But what I want to tell you all is that read reviews about a product, but check out swatches in person at the store... For example, review of one MAC eye shadow will be the same for all eye shadows! They are awesome! PERIOD... Browse through various EOTDs but swatch them on yourself before yo buy it cause when you go on a swatching spree at MAC you discover hidden jewels like Nylon, Club, Patina, Green Smoke, Ego, Honesty to name a few :)

So anyways, I got myself this magical eye shadow quite a while back and have even reviewed it here...
REVIEW OF MAC CLUB


The "magical" thing about this eye shadow is that on its own its a pretty, light mossy green eye shadow but when you apply it over a black base, then the shade of green that it takes on is just plain exotic and mysterious :)

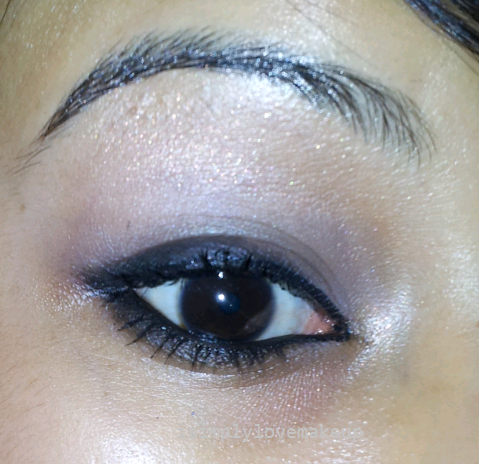
Take a look at my EOTD below... It's an attempt at smokey eye and quite a good one that too... Yup I have always been the humble one ;) Now would you believe it if I said that only one shadow i.e. MAC Club has been used to create this smokey eye and no other eye shadow.. Not even black... Yes of course I have used a highlighter shade but thats it! The dimensions this eye shadow gives you is just unparalleled and I am totally smitten by it...


Do let me know what you think of the EOTD and the eye shadow :)

Monday, December 3, 2012

EOTD: Smoked Out Liner Look

This is going to be a really small post with only a handful of pictures... You know how awesome Smokey eyes look don't you... Well I am now trying out the the "smoked eye liner" look nowadays... Once I "master" it, I'll  be doing a full fledged post on it and even a couple of tutorials...

But following is just a few shots of my first attempt at it... Lemme know of what you guys think about it...


Friday, November 30, 2012

EOTD: Red Smokey Eyes... Yes! RED! :P

Red lipsticks are all the rage now and with everyone looking for their perfect Red, it is now become a norm to see a lot of Red lipstick reviews and a lot of Red LOTD posts... Yes I am guilty of quite a few too ;) But last night I thought of trying out Red on my eyes... Something drastic you say? Not really, if you know how to tame Red on your eyes, you are then another bit closer to achieve the know-all of makeup ;) Now who wouldn't want to do that ye? *Yup the "ye" part was an Irish imitation... Am watching a lot of Sons of Anarchy these days ;)*

Here is the look... Your views are really WELCOME! And I would love you guys to be brutally honest with me :D

With Flash


I paired it with Pink Blush and Nude Lips :)


And this is what I used to create this look... Coastal Scents 88 original palette...


Oh btw if you guys actually like the look, then let me know I'll pakka se do a tutorial on it! :)

Monday, November 26, 2012

EOTD & Makeup Break-up: Pink and Taupe

It's been a while I did any EOTDs for the blog... And I promise this time it wasn't laziness ;) The thing is as Winters start setting in and the weather becomes dry, I start getting dry patches over my lids and below my chin :( And though I do use an ointment for it, it does take time for them to heal completely... So last night while washing my face after the gym, when I noticed that the dry patches had started to heal, I for my brushes and my MAC and Inglot palettes out and did an EOTD... It felt so good :)

So here it goes...
With Flash
Without Flash


Makeup Breakup
1. MAC Sushi Flower (Light Pink) - Inner 3/4 of the eye
2. Inglot M363 (Taupe) - Outer V
3. Inglot DS51 (Sparkly Orange) - In the crease for blending
4. Maybelline Gel Liner - Lower waterline
5. Colorbar Precision Waterproof Liquid Liner - Upper Lashline (Winged)
6. MAC Zoom Fast Black Lash Mascara

Hope you liked the look :)

The pictures below are with Instagram Effects...


Those of you following me on Instagram must have already gotten a glimpse of the look last night

Monday, October 8, 2012

REVIEW & LOTD: Maybelline Eye Studio Color Tattoo In Fierce & Tangy

There is no denying the fact that Orange was the color of 2012 and might even spill over to half of 2013... If you didn't know this, then either you have been in a coma (God forbid) or are really really trying your best to clear your IIT entrances ;) Cause Orange has been everywhere... From apparels to accessories to makeup! And when I say makeup, I mean lipsticks, eye shadows, eye liners, lip glosses, blushes and well even concealers ;) And continuing the trend Maybelline, when finally launched its Eye Studio Color Tattoos in India, it continued with the shade of Orange called Fierce and Tangy as is available in other countries. They did decide to drop "Tough As Taupe" :( I had really been looking forward to that shade and well they just didn't introduce it here :( One of my Italina blogger friend Suhrya of Drama&Makeup says that Maybelline launched only 4 shades in Italy! That really makes me feel better now ;) LOL...

So anyways, going ahead with the review, I bought this shade cause I was just too bored of seeing goldens and coppers and bronzes and silvers and wanted a bright yet everyday wearable shade and since we didn't get Taupe in India, I had to settle for Orange :) Now Fierce & Tangy is a light Orange shade with minute (please DO NOT read it as "mi-nut" but DO read it as "my-new-t" :P) golden specs that blend with the Orange so well that it isn't really first noticeable but comes to life when you are taking pics with flash ;) And I love this effect! It instantly brightens my eye area :D

This can be used as an eye shadow as well as an eye shadow base. It when used alone looks pretty neutral yet bright on me and I love the effect :) I have been going through Indian beauty blogs and this shade hasn't really been reviewed or raved about much but trust me it is a very wearable shade and that too a pretty one :)

The best part about the product is it's loooooooong staying power. It just stays on and refuses to budge. I have experimented with it on un-primed, oily lids of mine in Mumbai's humid weather and I swear it stayed on me for more that 10 hours and that's like forever in my books! :D

Another important good thing about this is that it is water proof but not water resistant. This means it will not result in smudging and creasing and all that when you get wet i.e. it is water proof. But it is not water resistant is that it comes off easily when you wash it with soap and water, so it doesn't get weird when you wash your face and can really be easily removed. I hate it when I have to struggle to remove my eye makeup :(

I really feel that Maybelline has finally come out with a prize product that can easily be compared with MAC's Paint Pots but way cheaper! If Maybelline introduces newer shades in this range then it can surely give MAC a run for its money where Paint Pots are concerned.

Image of the Product:


Swatches:

Swatch without Flash
LOTD


Makeup Breakdown
1. Maybelline Color Tattoo Fierce & Tangy - All over lid
2. MAC Antiqued - Outer V
3. MAC Texture - Blended into Crease
4. MAC Ricepaper - Browbone
5. Colorbar Precision Liquid Liner - Upper Lashline
6. Maybelline Gel Liner - Lower waterline
7. MAC Fast Black Lash Zoom Mascara

Ooohhhss And Aaaahhhsss!!
1. It really really stays on for like ever!
2. Water proof but not water resistant.
3. This really is a gorgeous and a flattering shade!
4. It comes with a flat brush
5. Really affordable
6. I love things that come in little glass jars and dibbis
7. It can be used as a base as well :)
8. It doesn't make the eyelid itch or causes any reactions.
9. Very easily available.
10. Comparable to MAC Paint Pots but wayyyyyy cheaper! 


Ouches!! 
1. Just that it dries up fast and so you have to really quick with blending. I personally feel applying it with your fingers is much easier than with any brush.

Price
It costs INR 350/- with a brush!

Repurchase?
I am already contemplating buying a couple of backups for this shade ;)

Would I Recommend?
Oh definitely! This is a must have for Indian skintones and if you have been wary of Orange in your makeup then remember, Orange shadow is much easier to wear than an Orange lippy or gloos ;)
Plus they are comparable to MAC Paint Pots but way cheaper!

Overall Rating
10/10
 

Wednesday, August 8, 2012

REVIEW: Colorbar (Precision) Waterproof Liquid Eye Liner

We beauty bloggers are known (and sometimes expected) to keep trying out new products that keep getting launched in the market, but like everyone else we also have a selected few products that are our favorites and we keep going back to them :) Isn't it? Well for me Colorbar Waterproof Liquid Eye Liner in Black is one of them. I am on my fourth "bottle" and well I am yet to come across an eye liner that competes with it terms of price, pigmentation, staying power and waterproof-ness.

This eye liner has a decent pigmentation and though it may not be the "jettest" of black but it sure is black enough for me. The feature that makes it a champion for me is that it is really waterproof without even flaking... Another super awesome feature of this eye liner is that it stays out on my lids without rubbing/transferring even though my lids are super oily. Lakme intense artist transfers and even duraline mixed eye shadows don't hold up on my oily lids. But this Colorbar genius is with me through thick and thin or should I say through oil and water :)

It had a soft felt tip which makes it super easy to apply on the lids. It especially is helpful when doing a winged liner look :) And you guys know how much I love it don't you :)

The only downside of this product that I can think of is that it isn't waterline safe and well it does cause a bit of irritation if it gets into the eye.

Images of the Product:

Swatches:

EOTD:

Oooohhhsss And Aaaahhhsss!!!
1. It has a decent pigmentation
2. It is seriously waterproof.
3. It does not flake
4. It is great for oily lids
5. The precise felt tip makes the application super easy
6. It is smudgeproof
7. Very very pocket friendly I must say

Ouches!!!
1. It is not waterline safe.

Price:
It costs INR 250/- :D

Repurchase?
Oh yes! I am already on my fourth bottle ;)

Would I Recommend?
If you are looking for a practical, easy to apply, waterproof liquid liner then you must consider this. It will surely not let you down :) Just that it is not waterline safe.

Overall Rating:
9/10

Monday, May 28, 2012

Entry1 (Cotton Candy Eyes) For VanityNoApologies' Makeup Contest

Heylo people :) Here's me participating in an eye makeup contest organized by L'Oreal and VanityNoApologies :) The link for the contest is here

I have done a sparkly pastel eye makeup that is fun and fancy at the same time :) It reminds me of cotton candies :) I have used pastel pink, green and blue eye shadows to give it a cool yet ethereal feel to the whole look :)

Quoting Anshita: "Come up with an eye look that involves bright and colourful shades. Make sure the look is wearable so all the people here get some nice ideas to try out next time."
This look is wearable and I myself wore it yesterday! So here's the look :)


The products that I have used are as follows:
1. Eye shadows from Sleek iDivine "Original" palette.
2. Maybelline Gel Liner in my waterline.
3. Sleek Black eye shadow as a liquid liner using Inglot Duraline on my upper lashline.
4. MAC Zoom Fast Lash Mascara
5. MAC Ricepaper as highlighter.
6. MAC Paint Pot in Painterly as base


Hope you guys like this look :)

P.S. My digicam is not working properly, so had to use my phone for the pictures :( Apologies for the not so clear pics...

Do vote for me HERE 

Sunday, April 8, 2012

Natures Brilliance By Sue Mineral Eye Colors: Review, Swatches and EOTDs

Today, I am reviewing three mineral eye colors from Nature's Brilliance By Sue. I have been testing on their blush and lip balms too, which I will be reviewing later.  As this is my first review on their products, let us check more about the brand before the product description. About the Brand: Sue is the Sole Proprietor of Nature's Brilliance By Sue. It is located on the East Coast in a small town in New Jersey. It was formed to help people locate products for their skin tone & skin type. Sue has dealt with multiple allergies for years and through persistence and exhaustive research has found a line of natural mineral make-up and organic skin and body care products suitable for all skin types, even those with multiple allergies. Nature's Brilliance By Sue will not sell any product that is not 100% Natural or Organic and has not been tested by the owner her self. Sue has a Diploma in both Holistic Beauty Therapy and Holistic Herbal Therapy; with Certificates in Reflexology, Aromatherapy, Bach Flower Remedies, Crystal Healing, and Business Development for the Alternative Health Therapist, from the Natural Health Institutes, based in Canada. 

There is no detailed product description given, but as per the site these mineral eye colors are made of Mica, Iron Oxide. Matte shades contain Serecite (uncolored mica). These are mineral eye colors, hence that becomes a huge plus for all nature lovers. Why should we always go for the chemical ones?

Nature's Brilliance By Sue Mineral Eye Colors


Shades that I am reviewing
  1. Ocean Blue
  2. Mint Shimmer
  3. Blue Topoz Sparkle
These 3 shades are from the Blue & Green range.
There are many more shades available which you can check here 

Price
Retail Price: $6.00
Sale Price: $5.00

Swatches


EOTDs


My Experience with these Eye colors
I got a full size pack (Ocean blue) and 2 samples from the brand for reviewing purposes. From my point of view, the packaging is sturdy, fit and travel friendly. Still you need to be careful while application as there may be some fall outs because of the thing that they are loose eye pigments. The eye colors come in a cute small transparent plastic tub with handwritten shade name on the base. Isn't that natural for a mineral eye color? There is an inner vacuum lid present with tiny holes to prevent spillage, overall I don't find anything bad about the packaging.


From my personal experience, I loved all the three shades I got, especially the ocean blue one. The Ocean Blue shade has white, sky blue and bright ink blue shimmers which are glittery. To say about the Mint Shimmer shade, it is a lovely milky pale green shade with white and light green shimmers and the Blue Topaz shade is more glittery while comparing to the other two shades. The Blue Topaz one has a very slight ink blue tint which would not be that visible on your eyelids. All these shades are rich and smooth to be easily applied over your eyelids. A very small amount is needed for your whole eyelid area to achieve a soft look, however you can make it pigmented for a party or festival look. The shades ocean blue and mint shimmer are moderately pigmented with tiny shimmers while the blue topaz one shows just a little blue tint with more shimmery glitters. One needs to be more careful while applying their more glittery shades to prevent here and there' spreading of glitters around the eye areas.
   Some shades from the range are moderate pigmented with tiny glitters while the others are very shimmery having a slight tint. Of course, there are some matte shades too. The staying power is approximately 5 to 6 hours which is pretty good for me. These mineral eye colors can be easily removed with your regular cleansing milk. Overall, the mineral eye colors from Nature's Brilliance By Sue are worth every penny to try. You would love to wear them for party and festival eye looks, of course, the less glittery shades can be worn for daily wear too. I am in love with these mineral eye colors mainly for the reasons that they are soft, glittery and available in several number of shades.

PROS
  1. Several shades with different textures available such as shimmer, sparkle and luster.
  2. It is a mineral makeup product. Hence, no need to fear for much chemicals.
  3. No side effects.
  4. Smooth and easy application.
  5. Glittery shades for party/festival wear.
  6. Easily removable with a regular cleansing milk.
  7. Staying power is  5-6 hours, which is decent.
  8. Cute, Sturdy and travel friendly packaging.
  9. Samples are available to try.
  10. Affordable for the worth and quantity they provide.
  11. The color doesn't tend to change. It fades eventually without looking artificial.

CONS
  1. I find nothing bad about these eye colors. You might not like it if you're a lover of deep pigmented matte shade lover. I am not sure though, check out their other shades.
Overall Rating: 4.5/5

Recommendation: I highly recommend these mineral eye colors to all eye makeup and eye color lovers. A wonderful collection to try!

Would I Repurchase?: Do you think I wont? Of course I will purchase more from their collection. I am currently eying out for the soft pink and coral shades.

Product and Samples sent by PR for consideration

Thursday, March 22, 2012

Chessboard Eyemakeup Tutorial and EOTD

Chessboard eye makeup?  Have you ever heard about this thing anywhere? Even I haven't. I guess it's somewhat a beginner craze for me because I am obsessed with eye makeup nowadays. I am not a pro in it, but still I love to try different things on my eyes and post tutorials here. Please do bear with me girlies, I might not be excellent in these things :P I just do makeup my eyes, especially different things to pass time and show you all here. Okay how did I get this idea? Eager to know? huh I was simply cleaning and arranging things on my cupboard where I happened to see a chessboard. That's it! My brain starting working and connecting it with my makeup and this tutorial is the result of cleaning my cupboard today (after a long time, of course after receiving scoldings from my mom) "Lance.. Won't you keep your cupboard clean? " he he I went somewhere from the topic, let us move on to the tutorial now. Check out my other EOTDs here

Chessboard Eye Makeup Tutorial in 6 steps

Steps
1. Cleanse and prime your eyes. Dust with a compact and line your eyes normally as you line everyday, make it thin. You can also use kajal on your waterline if you wish.

2. Now starting from the center of your upper lash line, draw a slight curvy line pointing upwards. As shown in the image, draw 3 to 4 lines (make the lines little long one after one giving some mm between them).

3. After the lines dry up, draw lines horizontally (I messed up a little as it is my first try) :P till you finish with the last long vertical line. It should be somewhat like that the lower row contains many boxes and goes up in an ascending order.

4. Make sure, you should give time in between these steps to dry or else your eye liner would mess up. I used Lakme Insta Eyeliner here and I had to sit under fan for ages to dry :( I should have gone for something else for perfection. That's okay.. let's chill out.  After this step, you can see little boxes showing your eyelid skin colour.

5. Inside these boxes, fill your white eyeliner and allow it to dry. Touch up after drying for a perfect chessboard look. That's it. You are done! :D

The Final Look - EOTD

Chessboard Eye Makeup look - EOTD

Simple isn't it? Share your opinions about this tutorial with me in your comments!

So girls, how many of you have chessboards in your cupboard? :P

Thursday, March 15, 2012

Easy 3 Minute Eye Makeup Tutorial for Beginners

Hey girls! Today I am here with a simple EOTD. Being an eye makeup beginner, I started loving experiments in eye makeup and the results are these continuous EOTD posts. I am sure, I will be posting more EOTDs and tutorials here as I almost turned an addict of them. This EOTD is the result of my morning try. I just started to try something different, no pre planning and it ended up like this. I am not that impressed with my perfection here, but still I loved the colour combination a lot. I used 2 different eyeliners with different shades and made the eyeshadow subtle. Let me show you the pictures and explain you the steps briefly.


Steps

1. Cleanse and Prime your eyes. I skipped the primer here and used the Lotus Herbals Swift Makeup stick instead. Apply your kajal (Optional) and wash your eyelids with the eyeshadow of your wish. I made the shade of the eyeshadow very light in this EOTD.

2. Now start lining your eyes with your favorite shimmer eyeliner. Don't go for black this time as black is the colour we girls use most of the days. If you are a expert in lining your eyes, you can do it in your comfortable way. If you're still a beginner, don't worry. First start lining from the middle upper lash line to the the outer corner, then line from the inner corner and join both. You can extend the eyeliner up to a some length of your wish but I personally prefer to extend not more than a bit, for a natural look.

3. After the eyeliner gets dry, start lining thin above the glittery eyeliner using your pencil eyeliner. Make sure both the shades match. As the first one we used is the shimmer one, a matte eyeliner will do the trick now. I prefer using any dark colour for this to get a fuller eye look. Apply your mascara and allow it to dry.

4. Now you can skip this step if you want :P I just tried something funny. If you're going out somewhere, please do skip this step. I designed my outer corner little funny with a liquid eyeliner simply. That's it. My EOTD is done. As a beginner, I felt very easy doing this, so hope you will too.


Products Used
1. Lotus Herbals Swift Makeup Stick.
2. Lakme Fantasy Shimmer Eyeliner (Midnight Moon)
3. Deborah Milano Long Lasting Eye Pencil
4. Lakme Insta Eye liner
5. Faces Cosmetics Eyeshadow Duo

Hope you liked the tutorial. I am waiting to hear from you what you feel now! :)

Wednesday, February 8, 2012

GUEST POST: Valentine's Day Look and Tutorial

Guest Post by Bidisha

You all know that I have a giveaway underway on ISimplyLoveMakeUp where I will have two winners. One winner wins a GlossyBox and another winner will win three of my favorite lipsticks :) If you haven't entered it yet then worry not beauties you can still enter it here. As a part of one of the rules, Bidisha from http://glisteningkaleidoscopiceyes.blogspot.in has very sweetly done a guest post about a Valentine's Day look and a tutorial :) I wont introduce her to you all just yet, for that you'll have to be a little more patient and wait for a couple of more days ;) So over to her for now...
Hello everyone...
This is Bidisha here
I am so excited today to write a post for my adorable friend suma <3
So today i thought of doing an easy eyemakeup tutorial for you all
This particular eyemakeup can be done during day and is also suitable for evening !
In this tutorial I used sponge applicator instead of brushes.
So lets get started with the tutorial
Here is the step by step pictoral demonstration >>>>>>>

1.First apply concealer around your eyes to hide the darkness (if any)
2.Then apply a mauvish silver frost eyeshadow all over the eyelids (I used Deborah Milano Ombretto mono hi-tech eyeshadow)
3.Then apply a taupy/bronzy brown eyeshadow on the outer corner of your eyes (I used the brownish shade from Lakme botanica eyeshadow quartet)
4.In order to give a twist to your eyemakeup, apply a burgundy/cranberry colour eyeshadow on the transition area where the mauve and brown meets; don't forget to blend the colors well. (I used the cranberry shade from the Botanica quad again)
5.Then apply your favourite black kohl liner on the waterline.
6.To intensify the eye makeup, line your upper lashline with that black kohl liner instead of liquid liner.
7.Finally finish off the makeup using a good black mascara on the lashes ! (I used Maybelline colossal volume mascara)

And here's the final look >


I hope you all liked this eye makeup tutorial
On my face i just applied Lakme rose powder and on my lips i used my favourite Avon lip balm in cherry
Since this is an eye makeup tutorial i didn't focus much on blush and lipstick !
I hope you all enjoyed this quick tutorial...
Do comment to share your views :)
with love,
Bidisha !

Tuesday, March 15, 2011

EOTD: Yellow and Pink

Hello ladies... I finally did a look using my brand new Coastal Scents 88 Eye Shadow Palette... Yay Yay Yay! :D
Also do note that I could finally use yellow on my eyes. Honestly? I have been itching to do a yellow EOTD since a long time now but whenever I would I would go to purchase a yellow eye shadow, I would get side tracked and end up buying something in either Pink or Purple :P LOL... So finally when I got my Coastal Scents palette I knew that the first look I wanted to do using it would be something with yellow!
EOTD


A Side View


The Products that I used
 Hope you guys like it...