Showing posts with label Kitchen Beauty Tips. Show all posts

Friday, July 6, 2012

Homemade Facial Kit with Kitchen Ingredients


Facial is one of the most important skin care regime. Facial massage treatment helps blood circulation, skin elasticity, reducing age wrinkles and increase skin glow. It also retains the moisture in the skin. Facial massage is the best method to get rid of black heads and white heads.

There are so many facial kits in the market. Many kits perform well and are very efficient on the skin. Yet, there is something more efficient and worth believing in its performance on the skin. All the items from your very own kitchen shelf make into a great facial kit.

I usually follow the kitchen shelf items facial massage routine. My Facial Kit comprises of

  •         Milk
  •         Milk cream
  •         Crushed almond powder
  •         Tomato juice
  •         Few drops of honey

Done. These items are readily available at any point of time in any body’s kitchen.

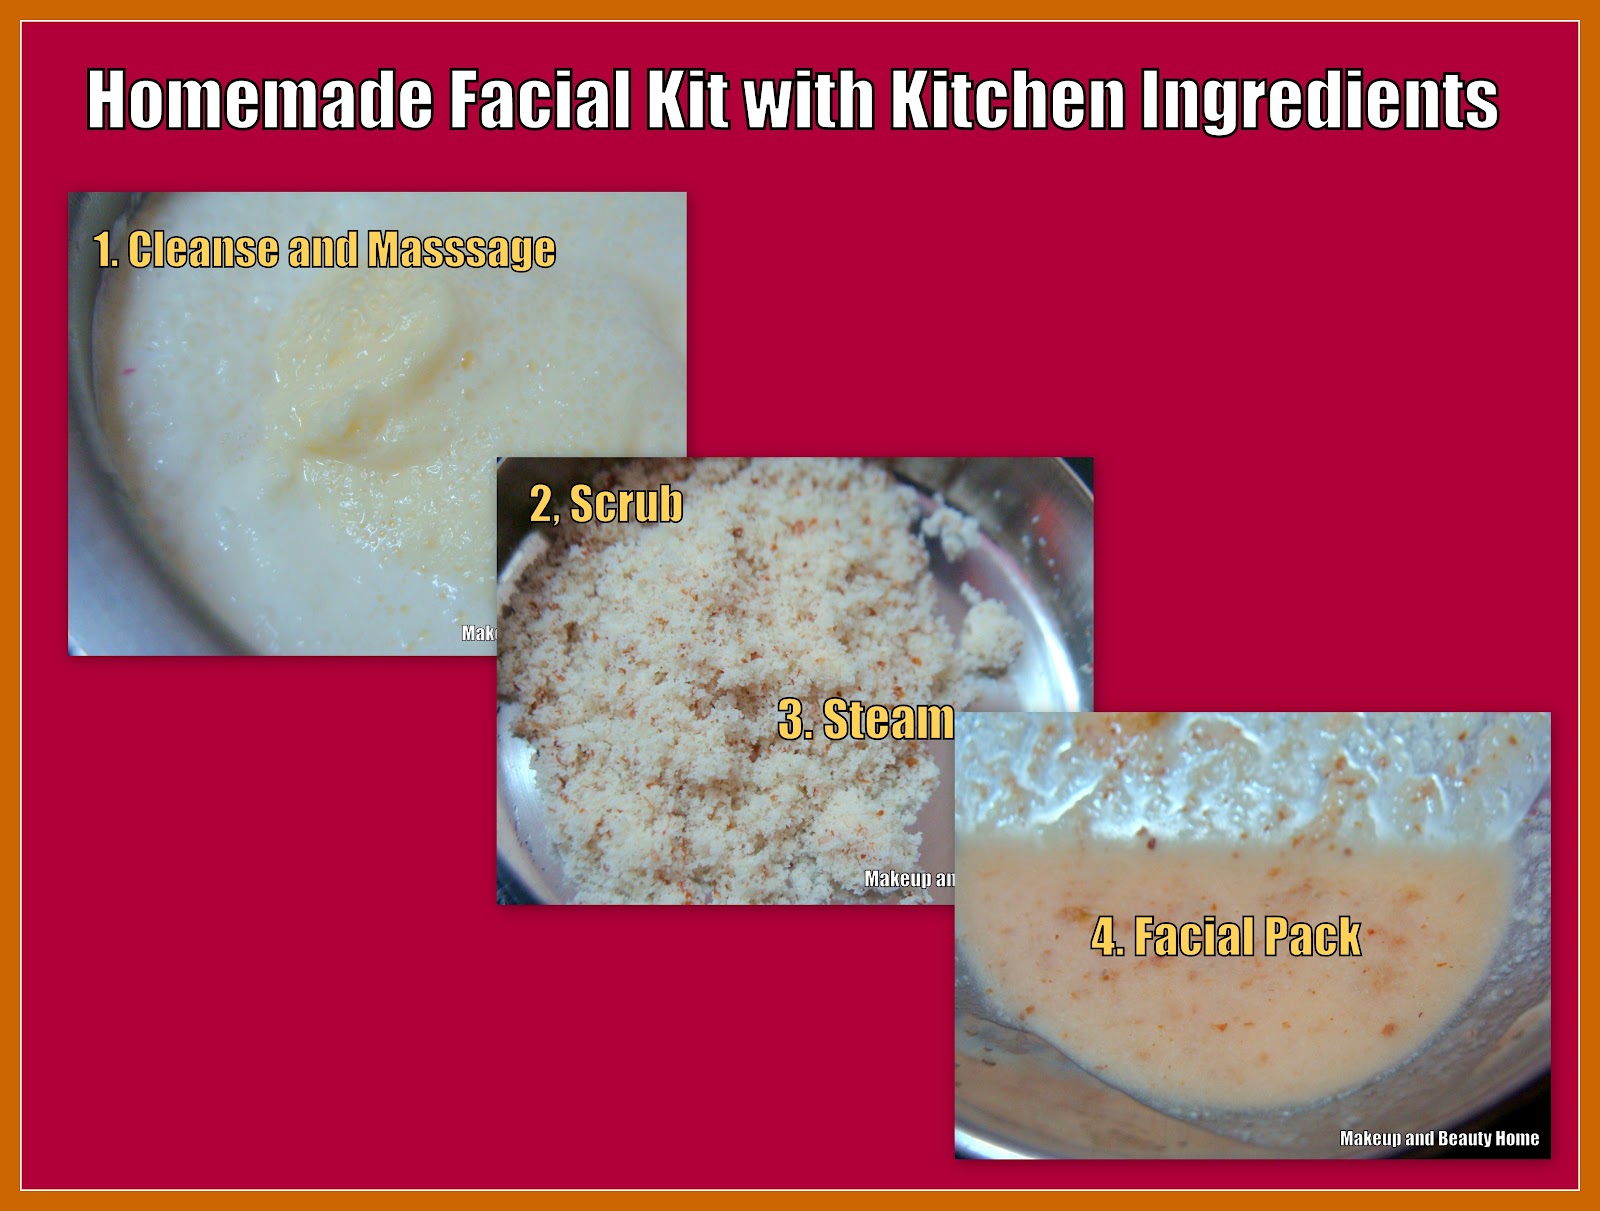
Step-by-Step Instructions:

Step 1: Cleanse & Massage

Milk forms an excellent skin cleanser. Massage a spoon of milk on to your face for about 2 minutes and wipe it off with a wet cotton or tissue. Milk cream forms a great massage cream. The hydration it provides to the skin is excellent. I take a coin size of amount of the milk cream to massage my facial and neck. (Yes, do not forget to massage your neck as well.) Massage for about 10 minutes. [Editors Note: This process provides hydration to the skin and also cleanses the dirt, makeup residues and dust effectively]

Step 2: Scrub

My scrub is the almond powder. It is a perfect scrub granule for the skin. It is not harsh on the skin. Since it is mild scrub, scrubbing can be carried on even up to 10 minutes. But lazy, I do the scrubbing only for 5 minutes.


Step 3:  Steam

After the scrubbing I give a hot steam treatment for my face and neck. I use a vaporizer for this method. A thick towel dipped into hot water and drained can also be used for this treatment.


Step 4: Facial Pack Treatment

A pack on the face will complete the facial treatment. I usually prefer a thin layer of the face pack on my face and neck. So, I use 3 spoons of tomato juice, 3 drops of honey and quarter spoon of almond powder. If you need a thick paste, reduce the amount of tomato juice and increase the amount of almond powder. Apply evenly on face and neck and wash after the pack dries.


There….. You have saved lots of your hard earned money.


Editor's Note: That's a fabulous post Chand. I am surely trying this facial soon. 
So how about you girls? Leave your feedback below.


Important Note:  The person with highest number of giveaway entry posts will win a surprise goodie hamper in this MABH 400 Followers Celebration Giveaway Contest! Enter now and win exciting prizes!!! 

Monday, June 4, 2012

Top Five DIY Beauty Fixes at Home

Everyone has their own 'beauty fixes'. We do follow some practices when we run out of our favorite skincare/makeup product. Most of them are common among everyone and some have always been 'secrets'. We are going check five common and more beneficial beauty fixes that many of the women swear around the world! Some of them might be natural, some budget-friendly, some quick and overall, beauty fixes are beneficial to every women out there. After reading the post, do not forget to share your beauty fix(es) below in the comment section!


Beauty Fix 1:
No Pimples Anymore
Mix together the Neem leaves and Tulsi leaves (basil). Paste them and apply this paste over your pimple affected skin before going to bed at night. Wash off face with cold clean water in the morning. Do this for 3 days to see the 'pimple free' face magic


Beauty Fix 2:
Out of your Toner?
It is not a very big worry if you ran out of your toner. Get some rose water, refrigerate it and use as your natural skin toner. Rose water cleanses out the leftover residues and softens skin with a nice cooling effect.

Beauty Fix 3:
Quick Nourishing Lip Balm
Ran out of your regular lip balm? Leave your worry. Get yourself a small box of Vaseline. Melt it in a double boiler and add 2-3 drops of Vitamin E oil [Extracted from the capsules] to it. Allow the mixture to cool down and your lip balm is ready to use now! Vaseline and vitamin E are two great sources of moisturizes. If you need some fragrance, add any of your favorite essential oil to this lip balm. Need some tint? Beetroot is there. Pour 2 drops of raw and thick beetroot juice to it. That's it, you're all done with your homemade lip balm.

Beauty Fix 4:
Skin Brightness in a Week?
Soak poppy seeds [Khus Khus] in water for 7-8 hours or overnight. Drain them and paste them to creamy paste. Mix two teaspoons of this paste with one teaspoon of fresh cream and blend together. After cleansing your facial skin, apply this smooth cream all over your face and neck. Gently massage for 10-15 minutes in upward motion and leave on for 10 minutes or until it is dry. Wash off with fresh cold water.

Beauty Fix 5:
All-in-one Overnight Face Pack
Get some fresh green fenugreek leaves and paste them until smooth. Use this paste as a face pack before going to bed every night. This removes pimples, blackheads, wrinkles and improves the skin complexion with regular usage. If you have dry skin type, add few drops olive oil to this face pack to prevent tightening of skin. You can see visible results within 10 days of usage.


Hope you liked the above beauty fixes. Now, its time to share girls! Share your favorite beauty secret(s) below and help the other divas out there. Let us make this a  'beauty secret sharing' space. And don't forget to enter our current running giveaways. We are planning to end those within 2-3 days. Hurry up! Quick.


Wednesday, April 4, 2012

Top 4 Facial Scrub Recipes from Your Kitchen

Day by day, our skin shed dead cells that forms a dark layer over the epidermis. This results in dull and lifeless looking skin, so you might need some exfoliating scrubs to get rid of these dead skin cells. Whether it is an expensive or a cheap priced scrub, everything matters about result is proper usage. You should be very careful during the scrubbing process as it may result in rashes if over done or simply a waste of time if done very gently. The sensitive skin areas such as face should be scrubbed off gently while a little more pressure is needed in rough knee and elbow parts. It is recommend to scrub off your dead skins at least once a week, however you can follow scrubbing twice every week if it is prepared with your simple and natural kitchen ingredients. How often we can run behind those attractively packed chemical scrubs? Don't you think they are filled up with artificial and chemical ingredients? Just stay away from them for a while and take a tiny visit to your kitchen to bring out the lovely and skin friendly ingredients! They naturally scrub away your dead skin cells to bring out that radiant glow. Let us check today, some interesting scrubbing recipes for dry and oily skin types. These recipes have the ability to remove dead cells, tan and improve your skin complexion.

Image source: Google Images

Dry Skin Scrub Recipes
Scrubbing may be a little tricky task for people whose skin type is dry. Don't you agree? It is because some overpowering scrubbing particles may scratch your dry skin resulting in rashes and scars. So make sure to choose ingredients that are gentle and mild. Your scrub recipe should also include some natural moisturizing ingredients to balance the moisture loss which happens during the scrubbing process. Well, are you ready? Check these following recipes and add glow to your dry skin by removing those dead cells and adding some nourishment.
  • A teaspoon of honey mixed with a teaspoon coarsely grounded oats and milk powder makes a perfect dry skin scrub. The oats gently scrubs of the dead skin layer while the milk and honey provide nourishment to your dry skin. Who wouldn't love to experience this yummy facial scrub? So hurry up! Take a small bowl and blend the mentioned ingredients. They can do wonders on your skin which you can find through the visible glow after every usage.
  • Some fruits can also nourish your dry skin well. Avocado, Papaya or Peach? Mash any one of these fruits and blend along with honey and a teaspoon of olive oil. Stir well until it turns into a thick pack. Now we need to add some khus khus to this fruit mixture for exfoliating effects. That's it. Blend well, spread on your cleansed face and start scrubbing gently with your finger tips. After ten to fifteen minutes, wash off with clean water and moisturize your skin.

Oily Skin Scrub Recipes
Not just improper maintenance, even regularly been cleansed and maintained skin has dead cells covered. This is all because of the dirt, pollution and oiliness. Oily skin types are hard to maintain in summers, hence they needed to be scrubbed off at least twice a weak to maintain an even complexion. Honey, milk powder or these kind of nourishing ingredients are not for your oily skin as they may increase the oil secretion and aggravate those angry pimples. Scrub recipes for oily skin types should be mild, as well as effective. Try these scrub recipes below to pamper your oil skin with fruit vitamins and to get rid of dead skins causing dark uneven skin tone.
  • Squeeze juice from half a lemon. Add two teaspoons of rose water and a teaspoon of rice powder to this juice mixture. Blend well to form a thick paste. Spread this scrub on your facial skin and let it sit there for 5 minutes. After that, wet your finger tips and gently start scrubbing in circular motion. Scrub for 5 minutes and allow the mixture for more two minutes and wash off with plenty of cold water. Rice powder acts as a dead cell and tan removing scrub while the lemon juice naturally whitens skin.
  • Tomatoes can also do the trick on oily skin types. Simply puree a tomato and add two teaspoons of grounded oats to it. Blend this mixture well and spread on your facial and neck skin. Scrub gently for a while and wash off. This scrub not only removes the dead skin cells, but also clarifies your skin and improves the natural complexion. Regular usage would result in spot free, patch free radiant skin!
Hope these recipes are useful! Make use of these natural scrubs and forget those chemical ones! Do you have any scrub recipes to share with us girls?

Friday, March 30, 2012

Get Fair Complexion in Ten Days

In countries like India, fair skin has become a huge craze among people and everybody wants to get fair. It cannot be done overnight but it is possible gradually with some home remedies. You need to follow a good skin care regime, diet and fitness exercise routine to achieve that clear glowing skin! Just don't run behind fairness creams and lotions filled with chemicals and preservatives because all you get is a bleached and ugly looking skin. Most of the fairness creams cannot provide your skin a natural glow at all. Go to your kitchen and find some natural ingredients that can help your skin to become more bright and clear! Use them everyday as advised and you can notice results gradually. Other than these fairness remedies, some preventive measures should also be taken in order to prevent your new glowing skin. If you follow the rules perfectly, glowing fair complexion is all yours! Today, I will be giving some ideas and tips to improve your skin complexion,especially for brides. Note them down, follow them and let us know how it works. It might not show dramatic results on your skin, but it is sure you can notice a good difference on your skin texture and complexion within ten days.

Image Source


The More Sun - The More Sunscreen
What does it means? It is not that you need to apply sunscreen only on  hot summer days. Don't allow those clouds to fool you, sunscreen is also important in cloudy days. The more you be out in sun, the more sunscreen with a good  SPF is needed. Make sure to choose a sunscreen with high SPF, so that you get a longer protection. It is recommended to reapply your sunscreen lotion once in every four hours. This is the first step when it comes to the treatment of getting fair skin, because you need to prevent your new fair skin. Alright! This is the very important step, so don't skip it.

Fairness Bath Body Pack
How many times do you bath everyday? Hope it is twice because of this hot sun nowadays. It is best to bath once in the morning and once in the evening, soon after returning home from your work/study place. Leave the morning session, because you would be in hurry of getting ready. Let us have a relaxing bath in the evening. Open your refrigerator and take some tomatoes and a lemon. In a blender, add a cup of besan (Gram flour), few tomatoes, 2 teaspoons of lemon juice. This mixture should be blended well to a smooth paste by adding required rose water. You can also add some green gram flour if available, though it's just optional. Now collect this smooth paste in a bowl and go to bath. Use your daily soap/body wash to have a mild bath, using a loofah and scrubbing skin gently would be much better. After you cleanse up the body skin, apply this fairness body pack on your wet skin. Leave on for 15 to 20 minutes. Now wash away this pack with plenty of fresh water and towel dry the skin. That's it! This body pack natural whitens skin, removes tan and eliminate those dead skin cells naturally. This should be followed everyday for ten days, in order to see astonishing results. However, you can make it in alternate days as per your convenience. 

Leisure Time Facial Skin Foods
So what can you do to improve your complexion in your leisure time? Is your skin oily? Mix equal amounts of rose water, lemon juice and potato juice. Using a cotton ball, gently apply this over your face and neck and allow it to dry. You can do your own works like watching tv, or cooking meanwhile. After it dries, splash fresh water and wash away. For dry skinned people, a mixture of milk on honey can be applied to improve the skin. A face mask made with almond paste can also be applied everyday on your face for dramatic results!  By these simple tit bits, you are helping your skin get out of tan and become bright faster.

Water.. Water.. Water!
Water is everything! When your body is dehydrated, you can do nothing on your skin. No topical treatments work  when you have inner health issues. Drink at least 3 liters of water everyday to notice extraordinary results on your skin complexion and texture. Water is an all rounder remedy when it comes to skin. Not whole month or a year, just try this for 10 days. After that you will stick to drinking water and recommend your friends to do this. Not only inside, your skin needs water too. So whenever possible, especially after sun exposure, splash fresh cold water on your skin to heal and calm it.

Hot Oil Body Massage
Resting in weekends? Here is a task for you. Select a base oil of your wish. (Eg. coconut oil or olive oil). Crush some Neem and Tulsi leaves and add them to this oil and heat it. When the mixture is warm, switch off the stove and apply this oil all over your body and start massaging. You can also ask someone to do this. This hot oil massage can be followed twice in a week to achieve fairer complexion. Do you know how this helps? This improves overall body blood circulation and removes old tan. Thus, your body skin glows like a diamond! This really works, don't skip this too. In our ten days fairness skin routine, follow it for at least four times.

Moisturize Daily
Last but not least, a good moisturizer is important to make all the above things work. Wondering how? I will tell you. Whatever you do for your skin, moisturization is important to retain moisture and keep skin soft and glowing! Have you ever noticed your skin after bath, those white patches or some dryness? if you use your finger nails to draw a line on your skin, those white lines would be visible. You should never ever allow this thing happen if you want glowing beautiful skin. Moisturization is needed for extremely oily skin types too, however it should be light. So, use a good face and body lotion after every bath or face wash to retain skin's moisture. This would not show you overnight results, but the results are just fabulous if followed regularly. So keep the word "Moisturization". Never skip it!

That's all. These are the things you need to perform these 10 days. Of course this is not a get fair quick routine, but it really works if you follow in a proper way. You can notice the brightened and softened effect on your skin after these ten days. This routine will be very helpful for brides, so take a challenge, follow it for ten days and let us know how it works!

Wednesday, December 21, 2011

Blemish Clearing Masks for Oily and Dry Skins

Strawberries are excellent sources of Vitamin C and folic acid, which helps to make your skin blemish free. It's antioxidants rejuvenates dull skin to bring out it's original glow. Making your own facial mask at home with fresh and juicy strawberries will be a lovely and yummy nourishment for your skin in all the seasons. Dry, normal or oily, whatever your skin type may be, usage of strawberries in your regular skin care regime, cleanses dirt, removes excess oil and fades blemishes naturally in a faster way. It also gives a really pleasant feel while wearing a strawberry facial mask because it delivers a wonderful flavor unlike other chemical masks which you do in salons and parlors. In this post, we are going to see two main facial mask recipes with strawberries, depending upon your skin type, one for dry and one for oily guys and girls. Normal skin types can use anything with light moisturizing agent like milk cream or honey (Read the note below the recipes). As this is a very natural homemade blemish cure mask, even sensitive and combination skinned people can use this without any fear of side effects :) Lets move on to the recipes!


Strawberry Blemish Clearing Mask for Oily Skin
Ingredients
  • Strawberries     - 3 or 4, as much as required
  • Fuller's earth     - 1 teaspoon (Don't get confused :P Fuller's earth is just Multani Mitti)
  • Lemon Juice     - Few drops
  • Rose water       - Required

Method and Application
  • Wash strawberries and put them in a blender. Blend till they are smoothly pasted.
  • Gather this paste in a small clean bowl, add fullers earth, lemon juice and required rose water. Mix well. This is our face mask.
  • Cleanse your face with an oil clear face wash, spread this smooth mask covering all the skin surfaces, including neck and allow it to work on your skin for 15 minutes. Rinse with cold water. 

Strawberry Blemish Clearing Mask for Dry Skin
Ingredients
  • Strawberries - 3 or 4
  • Milk Cream  - 1 teaspoon
  • Honey          - 1 teaspoon
  • Glycerin       - 2 drops (Use glycerin only if your skin is extra dry)

Method and Application
  • It's a very simple procedure :) Put all the ingredients in a blender. Wait till the mixture forms a creamy paste.
  • This is our mask and apply it as said above for oily skins, but remember you should use an hydrating face wash or soap to wash your face before applying this mask hence your skin is dry.
  • You can wait for 20 minutes and rinse your face with fresh and cold water. Moisturization after mask is must for dry skins, use a good branded moisturizer.

Note for Normal Skins : Hey don't worry that I didn't give you a facial mask recipe. Your skin is normal, so you can use anything according to your wish. Just rememer onething, if your skin is "normal to dry" you need to add some milk cream or honey to it and if "normal to oily" forget about the milk cream and use lime juice or tomato juice instead, that's the trick :)

Results of this Blemish Clear Facial Masks
However the ingredient list differs according to your skin type, the mask has it own strawberry properties :) So you do get the same wonderful results if followed regularly. I suggest everyone to use this mask at least twice a week to achieve faster results on your skin. You can feel your skin is so much cleared, became blemish free and acne scar free after including this mask in your skincare regime. It removes oil, dirt, dead skin cells and scars to give out a lovely glowing complexion! You can see your skin is lightened, brightened and toned without any blemishes like never before! Enjoy! :D

Wednesday, December 14, 2011

Improve Skin Complexion in 30 days at Home

A proper skin care regime is needed to achieve bright healthy complexion and prevent it from pollution, dirt and other skin enemies. Good moisturizers with SPF (Sun protection factor) would help us in developing and preventing the complexion and hence moisturizing is compulsory for all skin types. Oily skin needs moisturizers too. Some people needs a quick skin fix before a party, or a wedding to look bright and beautiful. It's not necessary to go for costly skin care products and cosmetics to achieve brighter skin. We can even brighten our skin with natural things available in our kitchen to enhance the skin color and look beautiful. In this post, I am going to give you step by step instructions to improve your complexion to an extent within 30 days. Follow the below skin care regime and become a skin beauty! :)
     I am not going to give you loads to work this time. A simple natural exfoliating fairness facial scrub and a nourishing fairness mask is going to be your routine for these 30 days. The exfoliating scrub should be followed thrice a week for normal and oily skins and if your skin is dry, you are going to do it once twice because it might strip of the moisture from your skin leaving it more drier. Hey wait! Don't escape dry skin girls and guys! :D Only the exfoliating scrub is twice, but you surely need to follow the nourishing mask everyday or in alternate days. This is to nourish your skin and remove the dullness which is caused by dryness.
With the above procedures I would also mention some skin care and diet tips to follow, to get better results on your skin. First, I'll give the recipes of the exfoliating scrub and nourishing face mask.

Exfoliating Fairness Facial Scrub
Ingredients
  • Orange Peel Powder - Two teaspoons
  • Rose water - Required amount
  • Dry skinned people keep in mind : Rose water is for oily skinned girls and guys, if you have normal to dry or extremely dry skin, I suggest you to add raw creamy milk instead of rose water. Additionally, you can also add milk cream and honey to this scrub (to prevent a stretchy feel and dryness)
How to Use
  • Wash your face with a good face wash or soap depending on your skin type.
  • Mix the orange peel powder with rose water (Oily skins), or milk (As I said for dry skins) and blend well to make a paste. The paste wouldn't be fine and it can't act as a exfoliate if it is fine, so don't worry.
  • Apply this paste on the surface of your face and neck evenly. Leave on for 15 to 20 minutes.
  • Let the ingredients work well on your skin to lighten it, just relax. You can place 2 cucumber slices or cold water dipped cotton pads above your eyes for a refreshment in this mean time.
  • Now comes the important step, cleanse your hands and make your face wet by dipping your fingers in water and tapping. Now gently scrub your face and neck with an upward circular motion for about 10 minutes with your finger tips.
  • After scrubbing, wash off with cold and clean water. Pat dry and moisturize, a heavy creamy moisturizer for dry skins and a light one for oily skins.
Results and Benefits
Orange has lots of antioxidants and citrus properties which are very essential for one's skin. It not only naturally bleaches your skin, it also acts as a wrinkle remover, spots and tan remover and skin lightener. So, following this above scrub regularly bleaches your skin in a natural way, removing dead cells, tan, giving a natural radiant glow which even skin lightening serums cannot give. Orange peel powder with rose water scrub removes excess oil while the same peel powder with the milk and honey mixture prevents skin from drying. So, the benefits and glow is same from the both scrubs, just the ingredients differs a bit as per your skin type. This scrub is recommend for brides also as it would make them look glowing and beautiful in their wedding day :) I recommend every girl or guy who craves for bright complexion to follow this scrub and get faster results.

Nourishing Fairness Mask
Ingredients
  • Almonds - 5
  • Oatmeal - 2 teaspoons
  • Honey - 1 teaspoon
  • Milk cream - required
  • Rose water - required
  • Oily skinned people keep in mind: This mask contains moisturizing ingredients which suits only dry skins well, so it is better to avoid milk cream and use lime juice instead to prevent excess oil secretion.

How to Use
  • Soak almonds overnight in milk or water. Peel them and paste them in the morning.
  • Mix this almond paste with oatmeal, honey, milk cream and rose water and blend well to form a smooth creamy face mask.
  • Cleanse your face and apply this pack covering face and neck, avoiding the areas around eyes.
  • Allow the mask to dry for 15 to 20 minutes and wash off with plenty of clean water. Moisturize!

Results and Benefits
Almonds makes skin smooth, soft and radiant while the other ingredients moisturizes the skin and provide required nourishment to the skin. Honey is also a natural skin lightener. This pack effectively cures acne spots, blemishes, tan and clogged pores. You can use this mask on the very same day when the previously mentioned scrub is performed, to nourish and calm down the skin and to retain it's natural oils. Dry skinned people are suggested to follow this mask once in two days or even everyday to achieve good results in these 30 days of skin regime :) Oily guys and girls, twice a week is enough. :)

Other tips: Drink plenty of water and use a high SPF sunscreen in these 30 days to prevent the fairness you gained or else the results will be lost. A good 8 hours sleep maintaining your skin clean these days is also very important for good results.

Hope you liked the skin regime package. Drop your comments for doubts :D I am here to help!

Monday, December 12, 2011

How to Make Kajal (Kohl) at Home - For Bright and Healthy Eyes

Most of the women love wearing kajal on their eyes everyday as it highlight eyes and gives a bright look :) I got an idea of making my own kajal long before and successfully made it today! :D It really came out well and I wanted to share this secret procedure with you all. I hope you will like this post. Kindly note down the steps, make your own natural kajal and wear it everyday. This cools eyes and refreshes it, thus your vision gets better with regular use. I also suggest you to use this kajal every night before going to bed for bright and beautiful eyes. I have never felt such a cool feeling in my eyes like I felt today, I am really in love with my natural kajal. Let me tell you how I made it..

This is how it looks on my eye:


Things you will need :
  • Almonds
  • A long needle (A compass would be better though)
  • 2 same sized flat bowls ( Nice if not a conductor)
  • A long steel plate
  • A small container (To store the Kajal)
  • A drop of clarified butter or almond oil
Method:
1. Take an almond and carefully pin the needle into it's center, without breaking it into half. It should be like this..


2. Now you need to arrange the bowls and plates. Place two bowls in a straight line, there should be little distance in between them. The bowls are our stand. I used a steel bowl as I don't get a wooden one :( you can better use a wooden box or even a fireproof stand. Now place the steel plate above the stand.


3. After arranging, take the needle or the compass in which you pinned the almond, and wrap it's end with an holder or rough cloth carefully. As needle (iron) is a conductor, the heat will pass and you may burn your skin. Now you need to light the almonds and make them burn. Almond has oils and so it will act as a fuel for burning. I just simply switched on the gas stove and showed the almond in the flame for few seconds, it started burning. You should now gently and carefully hold the burning almond in between the bowls and below the plate, where there is free space. Take a look at this picture to make sure. (Sorry for the clarity :( )

4. A single almond will burn for about 2 minutes, after it stops burning and throw it off and do the same procedure with 4 to 5 almonds or as much as you need. You can see a black ashy layer forming on the bottom of the plate. This ashy layer which is formed by almonds oils, is gonna be our super natural kajal :) Take a look at the picture below, this is how the dark black ash of almond looks.. ( I am gathering it to store in my kohl container :D )


5. Now you have to gently scrap off the ashy layer with a knife or a steel scale as I did. Gather it and put it in a paper. Now carefully, drop this whole ash mixture into your container. I used an old empty Vaseline jar. After you stored the almond ash in the jar, add only a single drop of clarified butter(ghee) or almond oil. Mix well with a teaspoon's back side. Store it in a cool dry place. We made our own natural kajal now :)


The Shades on my hand
First one - Two swipes 
Second one - Single swipe


My Take on this Homemade Almond Kajal
I never reviewed my own prepared cosmetics before and this is the first one :) and my favorite one too. I really loved this kajal as it doesn't irritate my eyes even a bit as other chemical ones do. I had a great cool feeling soon after I applied it. It's my darkest known kajal ever. Yes! It is really so dark. It has almond properties which are good for the eyes, I heard that with regular use it will even make your vision clear. For beautiful, clean white eyes everyone should prepare this one and use it everyday, at least at nights.

Things which I liked about it:
  • Dark shade which many girls will like.
  • It is chemical free, so no need to fear about side effects.
  • This one can even be used on baby's eyes as it's very cooling and mild.
  • Cheap to do, beats even many expensive kohl's in worth.
  • More than all the things, it is healthy for eyes and makes the vision clear.
  • Refreshes eyes and cures dark circles with regular use, as it has cooling sensation.
Things which I don't like:
  • As this is homemade and chemical free, it might smudge. You cannot expect this one should be smudge free but it doesn't smudge much for me. I felt this is same like the other kajals in smudging.
  • Very very dark in shade, so it might be tough to remove it even with makeup removers.
Really no other cons! It's a great homemade recipe which I made :) and I wish to use it throughout my life. It's very cooling and makes my eyes healthy. I am in love with my natural almond kajal! I strongly recommend everyone to make your own and use everyday. Share it with your friends in Facebook and tweet it (It's my kind request) and help them to get beautiful bright healthy eyes!

Friday, December 2, 2011

Homemade Cleanser for Fair Complexion

I would like to remind you all once again, pale and bleached skin is not beautiful as most of the people think. They run behind a myth called "Fairness". They all need whiter skin, so they bleach it with chemicals and spoils the skin texture. What do you get by bleaching your skin and treating it with chemicals? You can achieve a temporary brightness, also it will never look healthy for sure. Soon after bleaching, you will get allergies and rough skin. No use of worrying after that, so please do avoid chemicals over your skin.
Dark or fair, a skin is beautiful only if it is clean, clear and soft. There are many people who have lovely dark complexion without any blemishes. In this post let me give you some effective natural home remedies which helps skin to get rid of blemishes and get brighter than before. Glowing skin is beautiful!! You have to follow the below cleansing tips without fail to achieve a lovely bright complexion.


ROLE OF CLEANSING IN SKINCARE
Cleansing plays an important role in the health and beauty of your skin. You should choose a perfect cleanser for your skin type seeing whether your skin is oily, dry, or normal. Personally I recommend using Clean and Clear Foaming Facial Wash if you have extremely oily skin and Ponds Daily Face Wash for dry skins. You should keep in mind that in winters, you should be aware of choosing a correct cleanser hence your skin loses excess moisture. I have normal skin and I use Ponds Daily Face Wash in winter :) It cleanses my skin gently without leaving it tight or dry.
HOMEMADE SKIN CLEANSERS FOR BRIGHT FAIR SKIN
Other than these branded products, you can also go for natural homemade cleansers to achieve a beautiful complexion! :) It is so simple to make your own cleanser.

Skin brightening Homemade Cleanser
  • Take 2 teaspoons of gram flour, add some green gram powder, few drops of lime juice and half a teaspoon of grounded oats to it.
  • Add required water to make a thick paste.
  • Apply it over your face and neck and leave it for 10 minutes to work on your skin to remove the impurities and tan.
  • After that wet your hands, tap your face gently and scrub the skin with circular motion for 5 minutes.
  • Wash off completely with clean and cold water. That's it. This natural cleansing recipe beats even costly branded face washes leaving your skin clean, clear, soft and dirt free. If this is used daily, you can see the difference in your skin within a week. It removes the suntan and improves skin complexion removing the scars and dark spots.
A simple tip, if you have dry skin add a bit of honey to it as it has hydrating properties which nourishes dry skin.
Cleansing should be done twice a day with soap or face wash and more than 5 to 6 times a day with clean fresh water to achieve good complexion fast. Splash fresh water over your face whenever you get time everyday to achieve a lovely bright complexion! :)

Thursday, December 1, 2011

Winter Skincare Recipes for Dry Flaky Skin

Our skin needs to be well moisturized and nourished to get rid of dryness in winter. Dry skin is the main cause of dull and stretchy feel. If our skin is not properly nourished, it loses excess moisture and even shows out wrinkles for many people. My aunt worried that she is getting wrinkles and fine lines over her face during winters. I recommended to use a good moisturizing soap as well as a body lotion everyday. Many branded products such as Nivea, Himalaya and Vaseline has good body lotions which keeps skin moisturized but still we can also prevent skin dryness and tightness in winter with few natural beauty solutions at home easily. The very first few skin friendly nourishing things that I get into my mind when I think of winter are
  • Milk
  • Honey
  • Aloevera Gel
  • Banana
  • Olive oil
  • Almonds
  • Curd
  • Glycerin
All of the above mentioned natural items are very effective in nourishing and moisturizing dry skin. If they are used properly in a correct preposition your skin can even beat the other cosmetics because all these things are all natural, free from chemicals, preservatives and side effect free. The other main goodness is they are easily available all time in your own kitchen :)


SKINCARE RECIPES FROM THESE NATURAL ITEMS

Milk and Honey Skin Tonic
I recommend everyone to use Milk and Honey as facial skin tonic to prevent dryness and improve your complexion. Do this every morning after cleansing your face to nourish your facial skin well and prevent dryness, removes tan, wrinkles and blemishes. It softens skin and gives a natural glow. As honey has natural bleaching properties, it also acts as a natural skin lightener.

Banana and Honey Mask for Glowing skin
Banana and honey mask can be used to prevent dryness as well as wrinkles and dark spots. Banana, when mashed and applied along with milk or honey effectively removes suntan and nourishes dry and lifeless skin to bring out a soft natural radiant glow, which makes you stay young forever.

Olive oil and Glycerin Skin Tonic for Extremely Dry Skin
To say about Olive oil and glycerin, they moisturizes even extremely dry skin in winter and keep them moisturized for long hours. They should be mixed in equal preposition and applied over your dry facial skin and left for 20 to 30 minutes. After leaving this natural skin tonic on your skin gently massage your face in circular motion with your finger tips. Wash off with clean and cold water. This can be done daily, even with some other essential oil to be a skin beauty even in winter :)

Almond and Yogurt Face Pack
(Whitens and nourishes skin)
Paste of almonds and curd (Yogurt) acts as a natural facial mask which not only moisturizes your skin, it also softens, removes tan and blemishes, prevents the signs of aging and improves complexion with regular use. If your skin is extremely dry add some olive oil to this pack.

Aloevera Gel Skin Serum
Extract gel from aloevera leaf and mix it with lime juice and honey. Use this as a thin face pack which effectively removes acne scars, spots, tan and also improves skin complexion without making your skin dry in winter.

So, try all these naturally available skincare items to enhance and protect your beauty this winter. Leave your beauty quires through comments and I promise I would reply as soon as possible.Take care of your skin my lovable readers :)

Monday, November 14, 2011

Homemade Mehndi Cone - Long Lasting and Dark Color Tips

All aged people, especially women love Mehndi (Henna) :) Mehndi is a temporary hand decoration which is loved by most of the women in the regions like India and Pakistan. Mehndi, I mean henna is also used in hair care purposes such as hair coloring and conditionally naturally. Mehndi is very famous among Indian brides, as they wear mehndi designs in their hands, feet, arms and different parts of the body :) I love mehndi a lot from my childhood, but I never knew how to make beautiful designs until the age of 12. After that I got practiced well a and now designs better than before :P (Not so professional, but better enough). Everyone in my family asks me to design their hands with mehndi and I wondered every time how to get a nice dark color and make the staying power long lasting. I have been always using ready made packed mehndi cones from the store which has artificial coloring agents but this time I wanted to try something different for a long lasting natural mehndi designs and good color. Yeah, I made my own mehndi cone :) It's very simple, natural and free from chemicals and side effects, which you can easily prepare at home :) Follow the instructions below to make your own henna cone. Before that, see my own design and the natural color which I got :D

MY MEHNDI DESIGN (FOOT) :D :D


HOW TO MAKE MEHNDI CONE AT HOME
  • Buy and bunch of mehndi leaves and paste them finely adding enough water, few drops of eucalyptus oil and 2 teaspoons of lime juice. Keep in mind, the paste should not be too thin or too thick, it should be in a right consistency for easy smooth application and better results.
  • Take a clean, plain polythene or plastic cover (Thin) and role it to get a nice cone shape. Fill this mehandi paste into the hollow cone and tape the cone on it's sides and bottom with lots of cello tape that the paste shouldn't get out even a bit.
  • Allow the mehndi paste and the other ingredients to set well for 1 hour, I mean leave the cone as it is at least for 1 hour before starting the application.
After an hour, cleanse your hands or feet well and cut the tip of your mehndi cone slighting with sharp scissors. Now start designing your hands with all natural homemade mehndi cone :)

LONG LASTING COLOR AND DARKNESS TIPS
  • We have already added lemon juice and eucalyptus oil which acts as the color darkening agent in mehndi, so no need to add any extra applications after designing.
  • If you wish to get more dark colour and a long lasting mehndi design, mix sugar with little water to make a thin sugar syrup. Dip a cotton ball in this sugar syrup and apply over the little dried mehandi and leave for 6 to 8 hours. It's much better to design mehndi at night before going to bed, and remove in the morning :)
  • Remove the mehndi from your hands after that and apply two drops of eucalyptus oil for a good lasting power and shine :)


Nourishing Winter Pedicure at Home

Hiya girls and guys! Hope this winter is going on well. All of us need extra skin nourishment in winter as our skin loses all the moisture and natural oils. Even I do feel uncomfortable with my skin in winters as its very dry and flaky. It's not only enough taking care of your facial and body skin with lotions and creams, we should also take care of our precious feet which bears our whole weight :). Even in summers our feet are usually dry and rough, then just imagine how it will be in winters? Just check your feet now, touch it gently. What do you feel? It's like toughing a rough cactus isn't it? :( My feet was like same till today morning, as I didn't perform any pedicure after summer. Today morning I found out an interesting way to perform a best winter pedicure and my feet became instantly soft and bright :)) as you see in the below picture..


So, how to perform this nourishing winter pedicure at home? And what are the things needed? A very few things which you can find in your kitchen :D

THINGS NEEDED
1. Salt
2. A small tub
3. Essential oils such as olive, almond, grape seed oils
4. Foot scrubber, loofah or a pumice stone
5. Soft towel
6. Nail cutter
7. Nail polish remover.
8. Cold cream or moisturizer.

FOOT SCRUBBER
Foot scrubber is very essential for every pedicure because it scrubs your feet well, removes the flaky dead skin cells and makes feet soft and smooth. If you don't have one you can purchase it from your nearest department store or you as also replace a foot scrubber with a good loofah pad or a pumice stone.


Okay now I will give the steps of performing this pedicure. :D

METHOD
1.Remove your old nail polish and file your nails. Fill the tub with warm water. The water shouldn't be too hot or cold, it should be bearable for your foot. Hot water is used in pedicure because it loosens up the pores of your skin and makes the scrubbing process more easier and fuller. It softens the rough skin and thus the impurities and dead skin gets removed easily :)

2. Now mix a hand full of salt, few drops of your regular body wash or shampoo and the essential oils to the tub of water. Salt acts as a great exfoliate while the essential oils nourishes your feet and prevent it from drying.

3. Blend the minute of water well to get lather like this and soak your feet in the tub for 15 minutes.


4. After 15 minutes, take out your feet and scrub it with your foot scrubber gently over the sensitive skin surfaces and little harder over the rough parts of your feet. Don't be too harsh to your feet while scrubbing.


5. After 10 to 15 minutes of scrubbing, wash your feet with plenty of clean and cold water. Towel dry and moisturize with a good moisturizing lotion or a cold cream like the ponds cold cream which I use all the time :) You can coat your nails with a good nail enamel if you wish. The process is complete. :)

NOTE: This winter pedicure can be followed once in every 15 days to prevent the beauty of your precious feet :) You should clean and moisturize your feet every night before going to bed in order to make it look and feet soft and smooth all the time :)

Softy softly feet is all yours now! Say goodbye to winter dryness :D :D

Sunday, November 13, 2011

Skin Benefits of Red Sandalwood

Hello Everyone! Today I am going to share with you all, few amazing skin benefits of red sandalwood powder.  I got a small pack of red sandalwood powder from my uncle and wanted to post its effective skincare uses here. When googled about red sandal, I happened to know that it acts as a good natural skincare product which helps our skin to get rid of many skincare issues. I used it to even out my skin, remove tan and vanish acne scars. Red sandalwood has skin lightening and anti-gaining properties abundantly. It fights wrinkles and fine lines to give a glowing young skin. For past one month I am using red sandal in many ways to help my skin get rid of some problems and now let us check what they are :)

Red Sandalwood Powder


Red Sandalwood Skincare Recipes
  • The powder should be mixed with tomato juice and used as a face pack to remove tan and lighten skin naturally. This also removes acne and dark spots effectively with regular use.
  • Dry skinned people, mix red sandalwood with milk and honey. Spread this cream over you face and neck and wash off with cold water after 20 minutes.
  • Mix the red sandal wood powder with rice powder with required water to use as a facial exfoliating scrub. After applying the paste over your skin gently scrub in circular motion with finger tips. Wash off. It helps clearing out even those stubborn blackheads.
  • To remove scars and to tighten the wrinkles mix red sandalwood powder with cabbage juice and use as your face pack.
  • Red sandalwood powder can be combined with your bath massage oil to improve the tone and texture of your skin
  • Add two-three pinches of red sandalwood powder to your regular homemade/store bought face pack. There you are done adding some magical ingredient to boost up the face pack results!
  • Dilute red sandalwood with water and spray this over your body to reduce excess body heat. This process not only balances the body heat, but also helps prevent skin infections.

Saturday, November 12, 2011

Best Home Treatment for Hair Loss

Many of our visitors asked me to write a post which gives natural and herbal remedies for thinning and falling hair. Hair loss is caused when your hair strands get weak and fall out. There are many causes for hair loss such as..
  • Vitamin deficiency
  • Loss of good night sleep
  • Mental stress
  • Improper maintenance
  • Hard water hair wash
  • Particular medicines
  • Pollution and dust
There are also other reasons like harsh combing, avoiding hair oils which nourishes hair which prevents dryness and breakage and usage of chemical cosmetics such as hair straighteners and hair sprays.

So, what can we do to promote healthy hair growth and prevent further hair loss or damage? Do we need to search for branded hair oils or run behind chemical lotions which claims faster hair growth? Do you think they will work? There is a great risk of losing your hair by using scented chemical hair products and cosmetics.
The best thing to do in your home to prevent hair loss and promote regrowth of hair is few natural and organic treatments, which causes no side effects. They keep your hair nourished and prevents hair loss in a very natural way, thus your hair grows healthier, softer and stronger. Let me explain in this post about a Castor oil Hot oil massage home treatment which works very effectively in preventing hair loss.


Castor oil is a vegetable oil which is extracted from the Castor bean. It's very thick in consistency and has a bit uncomfortable smell, but yet it acts as a best natural hair tonic which has lots and lots of hair repairing and nourishing properties. Get pure Castor oil from your nearest grocery shop and store it in a cool dry place.

USES OF CASTOR OIL IN HAIRCARE
  • Nourishes hair and prevents dryness.
  • Makes your hair says goodbye to split ends :))
  • It's antioxidants prevents scalp infection which causes hair fall.
  • Improves blood circulation in your scalp and strengthens hair roots.
  • Promotes faster hair growth that you can visibly see the difference.
  • Eliminates dandruff and leaves hair silky soft for sure :D
  • Thickens hair and makes it shinier with regular use.

HOT OIL MASSAGE WITH CASTOR OIL
  • Take required Castor oil in a small bowl.
  • Extract oil from 2 Vitamin E capsules and mix with the Castor oil (I use Evion Vitamin E capsules :) )
  • Blend this oil mixture well and heat it.
  • After the oil mixture warms down, apply it over your hair and scalp covering the entire hair surface in bearable heat.
  • Use finger tips and palms to massage your scalp gently. Rub the oil gently over split ends too.
  • Now wear a plastic cap over your head and cover it up with a clean towel and leave the oil to penetrate and work on your hair for at least 30 minutes. You can also leave this oil overnight on your hair for better results :)
  • After that, rinse out your hair completely with plenty of fresh water and your regular shampoo without any oil residue.
  • Silky soft and smooth hair which even beats peacock feather is all yours! :D Believe me, I have tried it. Following this hair care routine at least once in a week gives best results within 5 uses, as I listed in the uses of Castor oil above.

NOTE : You can also add some grape seed, almond or any other essential oil with this oil mixture to reduce the thickness of the Castor oil and a little bit uncomfortable smell :P.

Do you still think about the parlor products and chemical lotions to reduce hair loss? :D I hope you all would have started loving Castor oil which gives you a beautiful hair after reading this post! :) Good luck. Leave your comments!

Friday, November 11, 2011

Natural Face Mask for Skin lightening and Scar Removal

Tomatoes has lots of antioxidants which clears out dark spots in our skin. It can also be used in several natural skin treatments like clearing acne, large open pores, wrinkles, oily and dark skin. Rubbing a slice of tomato everyday over your face, makes your facial skin surface clean, clear and scar free. Tomato juice also natural whitens skin removing sun tan as it has whitening properties.
To say about coriander, it is an excellent home treatment for pimples, blackheads, blemishes and dull skin. It also has excellent anti aging, anti wrinkle properties and reduces the appearance of moles and dark spots with regular use.
In this post I am gonna teach you all how to use these two fresh natural cosmetic products, I mean tomato and coriander :) as a Anti scar and skin brightening facial mask. People has different skin types so they are unable to use all types of facial masks. The main two skin types are oily and dry, so let me give you two facial mask recipes with tomato and coriander, one for oily skin and another for dry skin :).


TOMATO AND CORIANDER FACIAL MASK
(For oily and dry skin types)
  • Mix 2 teaspoons of tomato puree with 2 teaspoons of extracted coriander leaf juice.
  • Add two drops of lemon juice and a teaspoon of fullers earth (Multani mitti) to mixture and blend well.
  • Cleanse your face and apply this smooth facial mask evenly over your face and neck covering the entire surface of your skin.
  • Leave this mask to penetrate and work on your skin for 15 minutes and rinse off with clean water.
  • If your skin is dry, you have to avoid lemon juice and Multani mitti as they may make your skin even more dry. Replace milk cream and honey for lemon juice and multani mitti. :) Normal skinned people just add rose water to the mixture of tomato puree and coriander juice :) That's it.

RESULTS
  • This facial mask, if used at least twice a week gives faster results in ur skin within a month.
  • It tightens your skin, removes fine lines, wrinkles, dark spots, acne scars, suntan, dullness and also fades moles.
  • This mask acts as a best home treatment for skin lightening.
  • It is much more better and naturally beneficial than the other chemical face packs you use in parlors :). Natural skin care is always the best and free from side effects than chemical based skin care cosmetics.